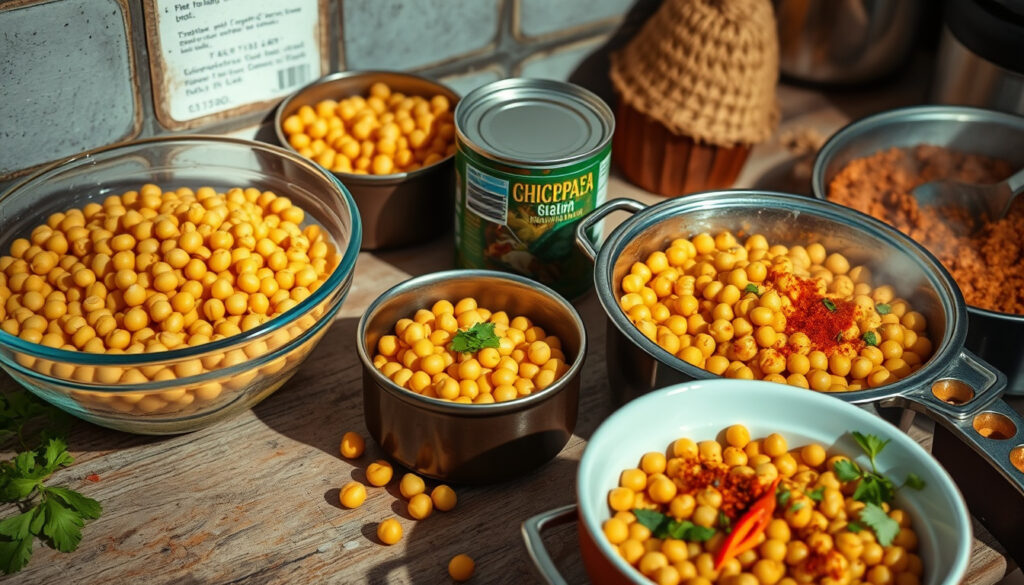
How to Cook Chickpeas: 5 Methods for Dry and Canned
You open the pantry, spot that bag of dried chickpeas you bought months ago, and think: “This would be great in tonight’s dinner.” Then reality hits — you’re not sure if you need to soak them overnight, how long they actually take, or which method works best on a weeknight. Good news: this article tests every major approach so you don’t have to guess. By the time you finish, you’ll know exactly which method fits your schedule and how to get that creamy interior every time.
Soaking time (dry): 8-12 hours · Stove cooking time: 45 minutes to 2 hours · Pressure cooker time (soaked): 6-10 minutes · Slow cooker high: 4 hours · Slow cooker low: 6-7 hours
Quick snapshot
- Soaked chickpeas simmer 20-25 minutes for firm texture (Healthy Nibbles and Bits recipe testing)
- Home-cooked chickpeas cost about half the price of canned (A Couple Cooks recipe developers)
- Cooked chickpeas store in the fridge up to 5 days (The Salted Pepper cooking guide)
- Precise air fryer times without dedicated tests
- Microwave method effectiveness varies widely
- Altitude adjustments for pressure cooking lack consistent data
- Pressure cooker method published March 2019
- Instant Pot chickpea guides emerged pre-2026
- Canning standards remain ongoing from Healthy Canning
- Step-by-step instructions for 4 methods
- Health considerations for specific diets
- Recipe ideas using cooked chickpeas
Five cooking approaches, one clear pattern: the method you choose shapes both time investment and final texture. Here’s how the main options compare.
| Method | Soaking required | Active cook time | Best for |
|---|---|---|---|
| Stovetop simmer | 8-12 hours overnight | 45 minutes to 2 hours | Traditional texture, no special equipment |
| Pressure cooker (stovetop) | 4-12 hours | 12-30 minutes | Speed with familiar equipment |
| Instant Pot / electric | Optional | 12-35 minutes | Set-and-forget convenience |
| Slow cooker | Optional | 4-8 hours | unattended cooking, meal prep |
| Canned (pre-cooked) | None | 5-10 minutes | Weeknight convenience |
How can chickpeas be cooked?
Chickpeas adapt to nearly every cooking setup you already own. Whether you have a ancient stovetop pot or a modern electric pressure cooker, the legume responds well — you just adjust the timeline. The main variables are soaking time, heat source, and how much hands-on attention you want to give.
On the stove
Traditional stovetop cooking rewards patience but pays off with reliable results. The process takes longer than pressure methods, but the equipment requirements are minimal.
- Sort and rinse 1 cup dried chickpeas, discarding any debris or shriveled beans
- Cover with 2 inches of cold water in a large pot
- Bring to a boil, reduce heat, and simmer gently
- Cook soaked chickpeas 20-25 minutes for firm texture, 40-50 minutes for soft and creamy results (Healthy Nibbles and Bits recipe testing)
- Drain and use immediately, or store submerged in cooking liquid
The ratio matters: use 2-3 cups water per cup of dried chickpeas to ensure adequate coverage as they absorb liquid and swell (The Salted Pepper cooking guide). Adding aromatics like bay leaves, garlic cloves, or a pinch of kosher salt enhances flavor during cooking.
Stovetop cooking delivers the most consistent traditional texture. If you have a Dutch oven and 2 hours, this method rarely disappoints — and the cooking liquid makes an excellent base for soups.
The pattern: stovetop method works for every kitchen but demands the most time investment.
In a pressure cooker
Stovetop pressure cookers cut cooking time dramatically compared to open-pot simmering. The sealed environment builds pressure that penetrates the beans faster.
- Soak chickpeas 4-12 hours, drain and rinse
- Add 2-3 cups water per cup of dried chickpeas
- Seal and bring to pressure over high heat
- Cook pre-soaked chickpeas 18 minutes with quick release for standard tenderness (Creative Vegetable Gardener pressure cooking guide)
- For firm chickpeas: 30 minutes high pressure with full natural release, then ice plunge (The Salted Pepper cooking guide)
Quick release safety matters: run cold water over the sealed pot to avoid burns from steam (Creative Vegetable Gardener pressure cooking guide). Always check your manual for minimum water level requirements — pressure cookers need adequate liquid to generate steam safely.
Pre-soaked beans cook 12-18 minutes in a stovetop pressure cooker with natural release, compared to 50 minutes for unsoaked beans. The soak cuts active cook time by two-thirds.
The implication: pressure cookers reward advance planning, turning an overnight project into a same-day task.
Slow cooker methods
The slow cooker offers hands-off cooking for busy schedules. While not the fastest option, it requires minimal attention and works well for meal prep batches.
- Place sorted, rinsed dried chickpeas in the slow cooker insert
- Cover with water (2 inches above bean level)
- Cook on high for 4 hours or low for 6-7 hours (Jehan Can Cook recipe guide)
- Unsoaked chickpeas on low: 8 hours for al dente texture (Healthy Nibbles and Bits recipe testing)
- Check liquid level occasionally — beans absorb significant water
The trade-off is time versus convenience. Slow cookers work best when you load them in the morning and come home to cooked chickpeas ready for dinner.
What is the best way to cook chickpeas from a can?
Canned chickpeas come pre-cooked, so you’re not starting from scratch. The question is how to bring them to table quality quickly. Most recipes treat canned chickpeas as a convenience ingredient that benefits from a brief finishing step rather than extended cooking.
Rinse and heat
The simplest approach involves draining, rinsing, and applying heat. This removes excess sodium and canned bean flavor while warming the chickpeas to serving temperature.
- Drain canned chickpeas and rinse under cool water
- Stovetop: sauté in a dry or lightly oiled pan for 5-7 minutes, tossing occasionally
- Microwave: spread on a plate, heat 2-3 minutes, stirring halfway
- For crispy texture: spread on a baking sheet, roast at 400°F for 10-15 minutes
Home-cooked chickpeas deliver nuttier flavor and firmer texture than canned, plus they cost about half the price (A Couple Cooks recipe developers). The time investment pays off if you cook in batches.
What this means: canned chickpeas excel for weeknight meals where time matters more than texture.
Recipe ideas
Once warmed or crisped, canned chickpeas fit into countless quick meals. They work particularly well in grain bowls, salads, and one-pan dinners.
- Toss with olive oil, cumin, and smoked paprika, then roast for a protein-packed salad topper
- Sauté with garlic, lemon zest, and wilted greens for a 10-minute side dish
- Blend with tahini, lemon juice, and garlic for a quick hummus variation
Is there a quick way to cook chickpeas?
Yes — and the speed depends on which appliance you use. Pressure cookers transform dried chickpeas from overnight project to same-day ingredient. The catch: you still need to plan roughly 1-2 hours total when accounting for pressure buildup and natural release.
No-soak pressure cooker
Skipping the soak saves planning time but extends pressure cooking duration. This trade-off matters if you forgot to start soaking the night before.
- Add 1 cup dried chickpeas with 2-3 cups water (no pre-soaking)
- Instant Pot: high pressure 35 minutes + 20 minutes natural release (A Couple Cooks recipe developers)
- Stovetop pressure cooker: 50 minutes high pressure + natural release (This Mess is Ours comprehensive guide)
- Unsoaked beans tend to be slightly drier than pre-soaked versions
Unsoaked chickpeas require 35-50 minutes of pressure time versus 12-18 minutes for soaked beans. The difference is substantial — plan accordingly if dinner is approaching.
Air fryer
Air fryers excel at crisping already-cooked chickpeas for salads and snacks. While they don’t cook from raw as effectively as pressure methods, they provide a quick finishing step for canned or previously cooked chickpeas.
- Preheat air fryer to 370°F
- Toss drained, rinsed chickpeas with oil and seasonings
- Cook in single layer 15-20 minutes, shaking halfway
- Results vary by air fryer model and bean moisture level
The implication: air fryers work better as a crisp-up method for already-cooked chickpeas than as a primary cooking vessel from dried beans. Exact timing without dedicated tests remains unclear, but 15-20 minutes at 370°F produces consistent results for canned chickpeas.
Instant Pot hacks
The Instant Pot (or any electric pressure cooker) offers several shortcuts beyond standard pressure cooking. These hacks reduce total time or improve specific outcomes.
- Quick soak method: pressure cook unsoaked beans 35 minutes, natural release 20 minutes, drain, then boil 1 hour with fresh water — cuts total time but adds a second step (Healthy Canning preservation guide)
- Baking soda shortcut: add 1/4 teaspoon baking soda to soaking water to accelerate softening — especially useful for older, drier beans (This Mess is Ours comprehensive guide)
- Hummus-ready texture: pressure cook soaked chickpeas 28-30 minutes for mashable texture perfect for smooth hummus (A Couple Cooks recipe developers)
How much time do chickpeas need to boil?
Boiling time depends primarily on whether you’ve pre-soaked the beans. Unsoaked chickpeas require significantly longer heat exposure and yield less predictable results. Soaked chickpeas respond faster and more uniformly.
Unsoaked vs soaked
The soaking step isn’t just tradition — it substantially reduces cooking time and improves digestibility. Here’s how the timelines compare.
| Preparation | Boiling/simmer time | Total time (including soak) |
|---|---|---|
| Unsoaked (quick soak method) | 1-2 hours | 1.5-3 hours |
| 8-12 hour soak, then simmer | 45-90 minutes | 9.5-13.5 hours |
| Soaked + stovetop pressure | 12-30 minutes | 8-12.5 hours |
| Soaked + Instant Pot | 12-25 minutes + 20 min release | 8-12.5 hours |
What this means: the overnight soak dominates total timeline whether you cook on stovetop, pressure cooker, or Instant Pot. The cooking method affects active time, not necessarily total elapsed time.
Stove boil details
When boiling unsoaked chickpeas, the process follows a predictable sequence. Monitoring texture as you go prevents overcooking or undercooking.
- Cover dried chickpeas with 2 inches cold water
- Bring to full boil over high heat
- Reduce to gentle simmer — vigorous boiling can split skins
- Check after 45 minutes, then every 15 minutes thereafter
- Most unsoaked chickpeas reach tender texture between 1-2 hours
The pattern: older, drier chickpeas take longer. Store-bought dried chickpeas from the previous year may need the full 2 hours. Fresh-harvested or recently dried beans often finish closer to 1 hour.
How to cook soaked chickpeas?
Soaked chickpeas represent the sweet spot between convenience and cooking time. The overnight soak softens the exterior and begins breaking down complex starches, so subsequent cooking proceeds faster and more evenly.
Stove after soak
Stovetop cooking after soaking remains the most accessible method — it requires only a large pot and a stove. The trade-off is hands-on time and monitoring.
- Drain and rinse soaked chickpeas thoroughly
- Cover with 2 inches fresh water (discard soaking water — it contains oligosaccharides that cause digestive discomfort)
- Add aromatics: bay leaf, whole garlic cloves, kosher salt to taste
- Simmer 20-25 minutes for firm texture, 40-50 minutes for soft, creamy results (Healthy Nibbles and Bits recipe testing)
- Test 2-3 beans for doneness — they should yield easily when pressed but not be mushy
The 8-12 hour soak requires planning. If dinner is tomorrow and you forgot to start soaking tonight, switch to canned chickpeas or pressure cooker methods that work with unsoaked beans.
Other appliances
Beyond the stovetop, soaked chickpeas adapt to pressure cookers, slow cookers, and even air fryers (for finishing). Each method trades convenience for active time.
- Pressure cooker: 12 minutes high pressure + natural release after overnight soak (Jehan Can Cook recipe guide)
- Slow cooker: 4 hours on high after soaking — set it and forget it until evening
- Stovetop pressure cooker: 18 minutes with quick release for pre-soaked chickpeas (Creative Vegetable Gardener pressure cooking guide)
Step-by-step instructions
Follow this sequence for reliable results regardless of your chosen cooking method.
- Sort: Spread dried chickpeas on a baking sheet or large bowl. Remove debris, stones, and any shriveled or discolored beans. Rinse thoroughly under cool water.
- Soak: Submerge chickpeas in 2-3 inches of cold water. Cover and refrigerate overnight (8-12 hours). For quick soak: boil 2 minutes, stand 1 hour, drain, then proceed (Healthy Canning preservation guide).
- Cook: Choose your method:
- Stovetop: simmer 20-50 minutes until tender
- Pressure cooker: 12-30 minutes depending on soaked/unsoaked
- Instant Pot: 12-35 minutes high pressure + 20 minutes natural release
- Slow cooker: 4-8 hours on low
- Test: Remove 2-3 chickpeas and press between fingers. They should yield easily without being mushy. Undercooked chickpeas taste starchy; overcooked ones split and fall apart.
- Drain and cool: Transfer to a colander and rinse briefly with cool water to stop cooking. Use immediately, or store submerged in cooking liquid in the refrigerator up to 5 days (The Salted Pepper cooking guide).
“Cooking beans in a pressure cooker is cheaper: about half or more the price of canned!”
— A Couple Cooks (Recipe Developers, acouplecooks.com)
“The texture and flavor of home-cooked Instant Pot chickpeas are better than those from a can.”
— A Couple Cooks (Recipe Developers, acouplecooks.com)
“While cooking with dried chickpeas is a longer process, it is definitely worth it because it has more flavor than the canned.”
— Jehan Can Cook (Food Blogger, jehancancook.com)
Health considerations
Chickpeas rank among the most nutritious legumes, but certain health conditions warrant specific guidance.
Diabetes and chickpeas
Chickpeas have a low glycemic index, making them suitable for blood sugar management. Their high fiber content slows glucose absorption, and the protein helps maintain satiety. Research from established nutritional sources supports chickpeas as a beneficial component of diabetic meal plans.
Heart health
The fiber and plant protein in chickpeas support cardiovascular health when substituted for refined carbohydrates or animal proteins. Their potassium content supports healthy blood pressure levels.
Who should limit chickpeas
Individuals with legume allergies or FODMAP sensitivities may need to limit or avoid chickpeas. Those with irritable bowel syndrome (IBS) may experience digestive discomfort due to the oligosaccharide content — rinsing and discarding soaking water helps reduce these compounds.
The healthiest preparation method preserves nutrient content without adding excess sodium or fat. Plain cooked chickpeas (whether from scratch or rinsed canned) rank highest for nutritional benefit.
Pressure canning chickpeas
For long-term storage, pressure canning preserves cooked chickpeas without refrigeration. This process requires specialized equipment and attention to safety protocols.
- Pressure canning requires pint jars processed 75 minutes at 10 PSI; quart jars require 90 minutes (Healthy Canning preservation guide)
- Adjust processing time for altitude — increase 10 minutes per 1,000 feet above sea level
- Beans must be fully submerged in canning liquid throughout processing
- Restart timer if pressure drops below recommended level (Alpha Foodie canning tutorial)
Pressure canning requires steady 10 PSI throughout the entire process. If pressure drops, restart the timer from zero. Under-processing creates botulism risk — never shortcut this method without proper equipment and training.
Summary
Chickpeas reward whatever cooking method you choose — the key is matching the technique to your timeline. The overnight soak opens most rapid-cooking doors, while pressure cookers eliminate it almost entirely. For weeknight meals, canned chickpeas bridge the gap. For dedicated home cooks, batch-cooking dried chickpeas in a pressure cooker delivers superior flavor and texture at roughly half the cost of canned.
You end up with a method that fits how far ahead you can plan.
Related reading: how to cook chickpeas 3 ways · how to cook chickpeas in an instant pot pressure cooker
Frequently asked questions
Are chickpeas healthy to eat?
Yes. Chickpeas provide plant-based protein, dietary fiber, iron, and folate. They support digestive health, blood sugar management, and cardiovascular wellness when included regularly in a balanced diet.
Are chickpeas safe for people with diabetes?
Chickpeas have a low glycemic index and high fiber content that helps regulate blood sugar. They are generally considered appropriate for diabetic meal plans, but individuals should consult their healthcare provider for personalized dietary guidance.
Can heart patients eat chickpeas?
Chickpeas support heart health through their fiber, potassium, and plant protein content. Substituting chickpeas for higher-fat animal proteins may help manage cholesterol levels. As always, individuals with specific cardiac conditions should follow their physician’s dietary recommendations.
Who should not eat chickpeas?
Individuals with legume allergies or sensitivities to FODMAPs should avoid chickpeas. Those with IBS may need to limit portions and discard soaking water to reduce digestive discomfort. Anyone with kidney disease should consult their doctor about legume protein intake.
What is the healthiest way to eat chickpeas?
Plain cooked chickpeas — either homemade or rinsed canned varieties — offer the highest nutritional value without added sodium or fat. Avoid heavy sauces or deep-frying, which diminish health benefits. Roasting with minimal oil preserves nutrients while adding texture.
What is the healthiest bean for a diabetic?
Legumes including chickpeas, black beans, lentils, and kidney beans all have low glycemic indexes suitable for blood sugar management. Chickpeas rank particularly well due to their protein content and fiber profile. Variety in legume consumption provides diverse nutrient benefits.
More related posts
 Mufasa: The Lion King – 2024 Prequel, Cast & Release Date
 City Developments Share Price: Buy or Sell
 Physical 100 Season 1 Winner: Where Is Woo Jin-Yong Now
 Singapore Part-Time Jobs: Pay, Rules & How to Find Work (2025)
 How to Delete Browsing History on Chrome, iPhone, Android
 Lee Hui Li Husband: Microsoft Singapore MD Passes During Sabbatical
 CapitaLand REIT Share Price: Is It a Good Buy? (2026)